Real talk: Kids with January birthdays have it rough. Not only is it right after Christmas, but in many places it is so darn cold. So no fun, outdoor parties. It’s usually dreary, cold, and just blah. This year I want to make her birthday is fun as possible. And what is more fun than a unicorn party!? These fun unicorn party snacks are going to be the perfect way to celebrate her birthday!

How to make a fun unicorn party snacking board
Let’s be real – a huge part of the allure of this is the presentation. And I’m the first to admit that I think pretty food also means the most delicious food. And delicious this is!

Here’s what you’ll need as far as ingredients:
- 3 Tablespoons of Butter
- 5 cups mini marshmallows
- 6 Cups of Rice Cereal
- 1 – 19 ounce package of golden sandwich cookies
- 1 bag of microwave popcorn
- 1 – 24 ounce brick of white almond bark
- Pastel food colors: blue, pink, and purple
- Unicorn sprinkles

Most of this is normal stuff that all of us moms have handy. But be sure to get those unicorn sprinkles linked above — because they are the absolute cutest.
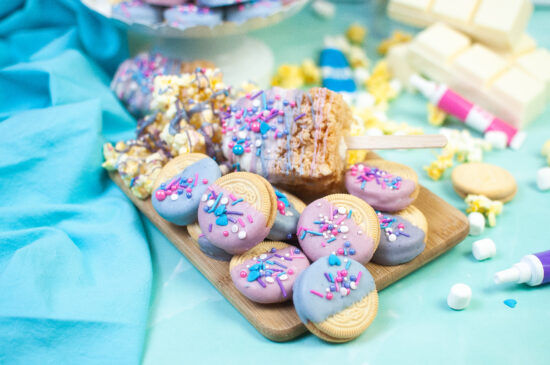
How to make Fun Unicorn Party Snacks
Unicorn Party Snacks
Ingredients
- 3 Tablespoons of Butter
- 5 cups mini marshmallows
- 6 Cups of Rice Cereal
- 1 - 19 ounce package of golden sandwich cookies
- 1 bag of microwave popcorn
- 1 - 24 ounce brick of white almond bark
- Pastel food colors: blue, pink, and purple
- Unicorn sprinkles
Instructions
INGREDIENTS -

- Add butter to a large pot over medium heat.
- Once the butter is melted, add the marshmallows and stir until the marshmallows begin to melt.

- Once melted and creamy, add the rice cereal, mix and remove from heat.

- Pour warm rice cereal mixture into a 13x9 dish. Flatten the mixture to fill the dish and level.

- Set aside.
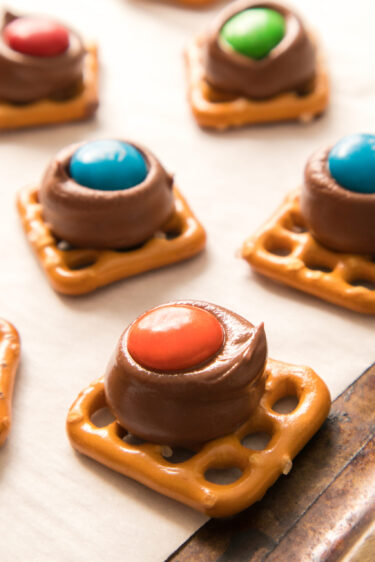
- Melt 4 cubes of almond bark in the microwave 30 seconds at a time stopping once smooth and melted. Divide into three bowls and add a few drops of food coloring to respective bowls until desired colors are reached.

- Dip a cookie halfway into the chocolate and set aside on parchment. Do this equally per color. Apply sprinkles before the chocolate sets.
- Pop the bag of popcorn. When done, pour out onto a sheet pan with parchment. Pick out any uncooked kernels and spread the popcorn out.


- Use the remaining colored chocolate to drizzle across the popcorn. Melt and color more as needed.
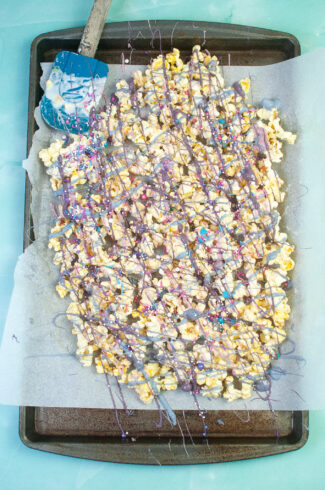
- Apply sprinkles before the chocolate drizzle sets.
- Let the chocolate cool and the break popcorn into handfuls of drizzled popcorn.
- By this time, the rice crispy treats will have set. Cut into desired size portions.

- Melt 3-4 more cubes of almond bark.
- Insert a popsicle stick into the melted chocolate just a little bit the insert sticks into each treat.
- Dip each treat halfway into the chocolate and set it on parchment. Let the chocolate set.
- Use the remaining colored chocolate to drizzle over the dipped treats, melt and color more if needed.
- Apply sprinkles to treats before the drizzle sets.

- Once snacks have set and the chocolate has dried, serve at the next unicorn gathering for some fun-themed snacks!

Other Unicorn Party Must-Haves
I’ve crowd sourced other amazing unicorn party must-haves. Here are some of my favorites.
Check out these unicorn headbands! From Kitchen Table Classroom

Adorable Unicorn Dreamcatchers from Hello Wonderful.

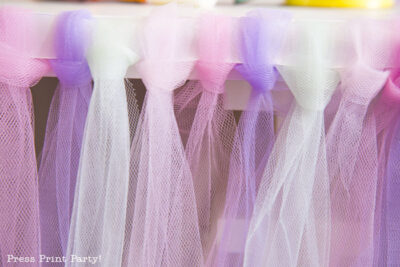
No Sew Tulle Table Skirt from Press Print Party.
Unicorn Selfie Prop

What else would you add to your unicorn party?! Leave a comment below!
PIN FOR LATER